How to Use
Learn how to get the most out of Zoom Crowd Services
Create Task – Form Explanation
This form is used to create a meeting task and automatically add participants (members) to a meeting. Below is the explanation of each field and what information you need to enter.
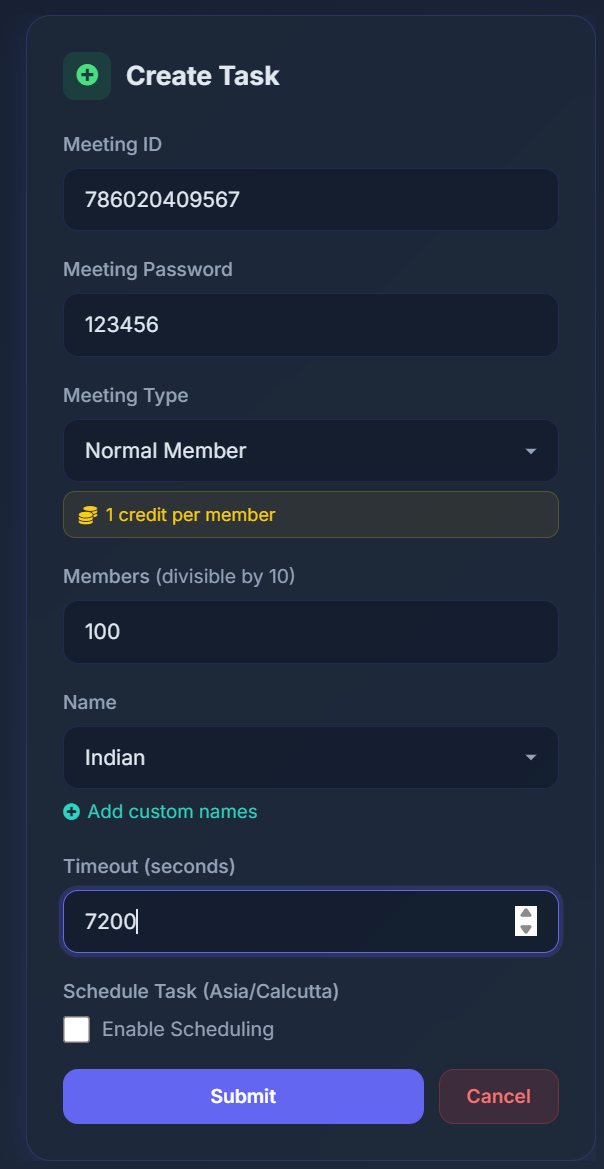
Meeting ID
Enter the Zoom Meeting ID where the participants will join. This is the unique meeting number provided when you create a Zoom meeting.
Example:
786020409567
Meeting Password
Enter the password of the Zoom meeting. Participants will use this password to join the meeting.
Example:
123456
Meeting Type
Select the type of participants (members) you want to add to the meeting.
- Normal Member – Standard participants without camera/video.
Credits Information
You will see a message like “1 credit per member”. This means each participant (member) added to the meeting will consume 1 credit from your account balance.
Example:
- If you add 100 members, it will use 100 credits.
Members (Participants)
This field defines how many participants (members) you want to send to the meeting.
Important notes:
- The value must be divisible by 10.
- Members and participants mean the same thing.
Example:
100→ 100 participants will join the meeting.
Name
This option selects the name category for the participants.
- Indian → Participants will join using Indian-style names.
You can also add custom names using the Add custom names option.
Important:
- Always add members less than or equal to the total number of names you provide.
- If the number of members is greater than the available names, the names will repeat in the meeting.
Timeout (seconds)
This defines how long the participants will stay in the meeting. The value is entered in seconds.
120→ Participants stay for 120 seconds (2 minutes).7200→ Participants stay for 7200 seconds (2 hours).
Schedule Task
This option allows you to schedule the task instead of starting it immediately.
- Enable scheduling if you want participants to join at a specific time later.
- The schedule follows the time zone currently set in your account (based on the country selected during signup). The meeting task will be scheduled according to the selected time zone. For example, if the time zone is set to Asia/Calcutta, the meeting will be scheduled according to Asia/Calcutta time. If you change the time zone to another region, the meeting will be scheduled according to that time zone. You can change the time zone anytime using the Time Zone button in the menu bar to schedule meetings in different time zones.
Submit
Click Submit to create the task and start sending participants to the meeting.
Before sending participants, please check the Zoom meeting configuration below to ensure that participants can join the meeting properly without restrictions.
How to Configure Zoom Meeting for Participants
To allow participants to join directly without restrictions, configure your Zoom meeting settings properly. Below are the correct and incorrect configurations shown side by side.
Step 1: Waiting Room Configuration
❌ Incorrect (Waiting Room ON)
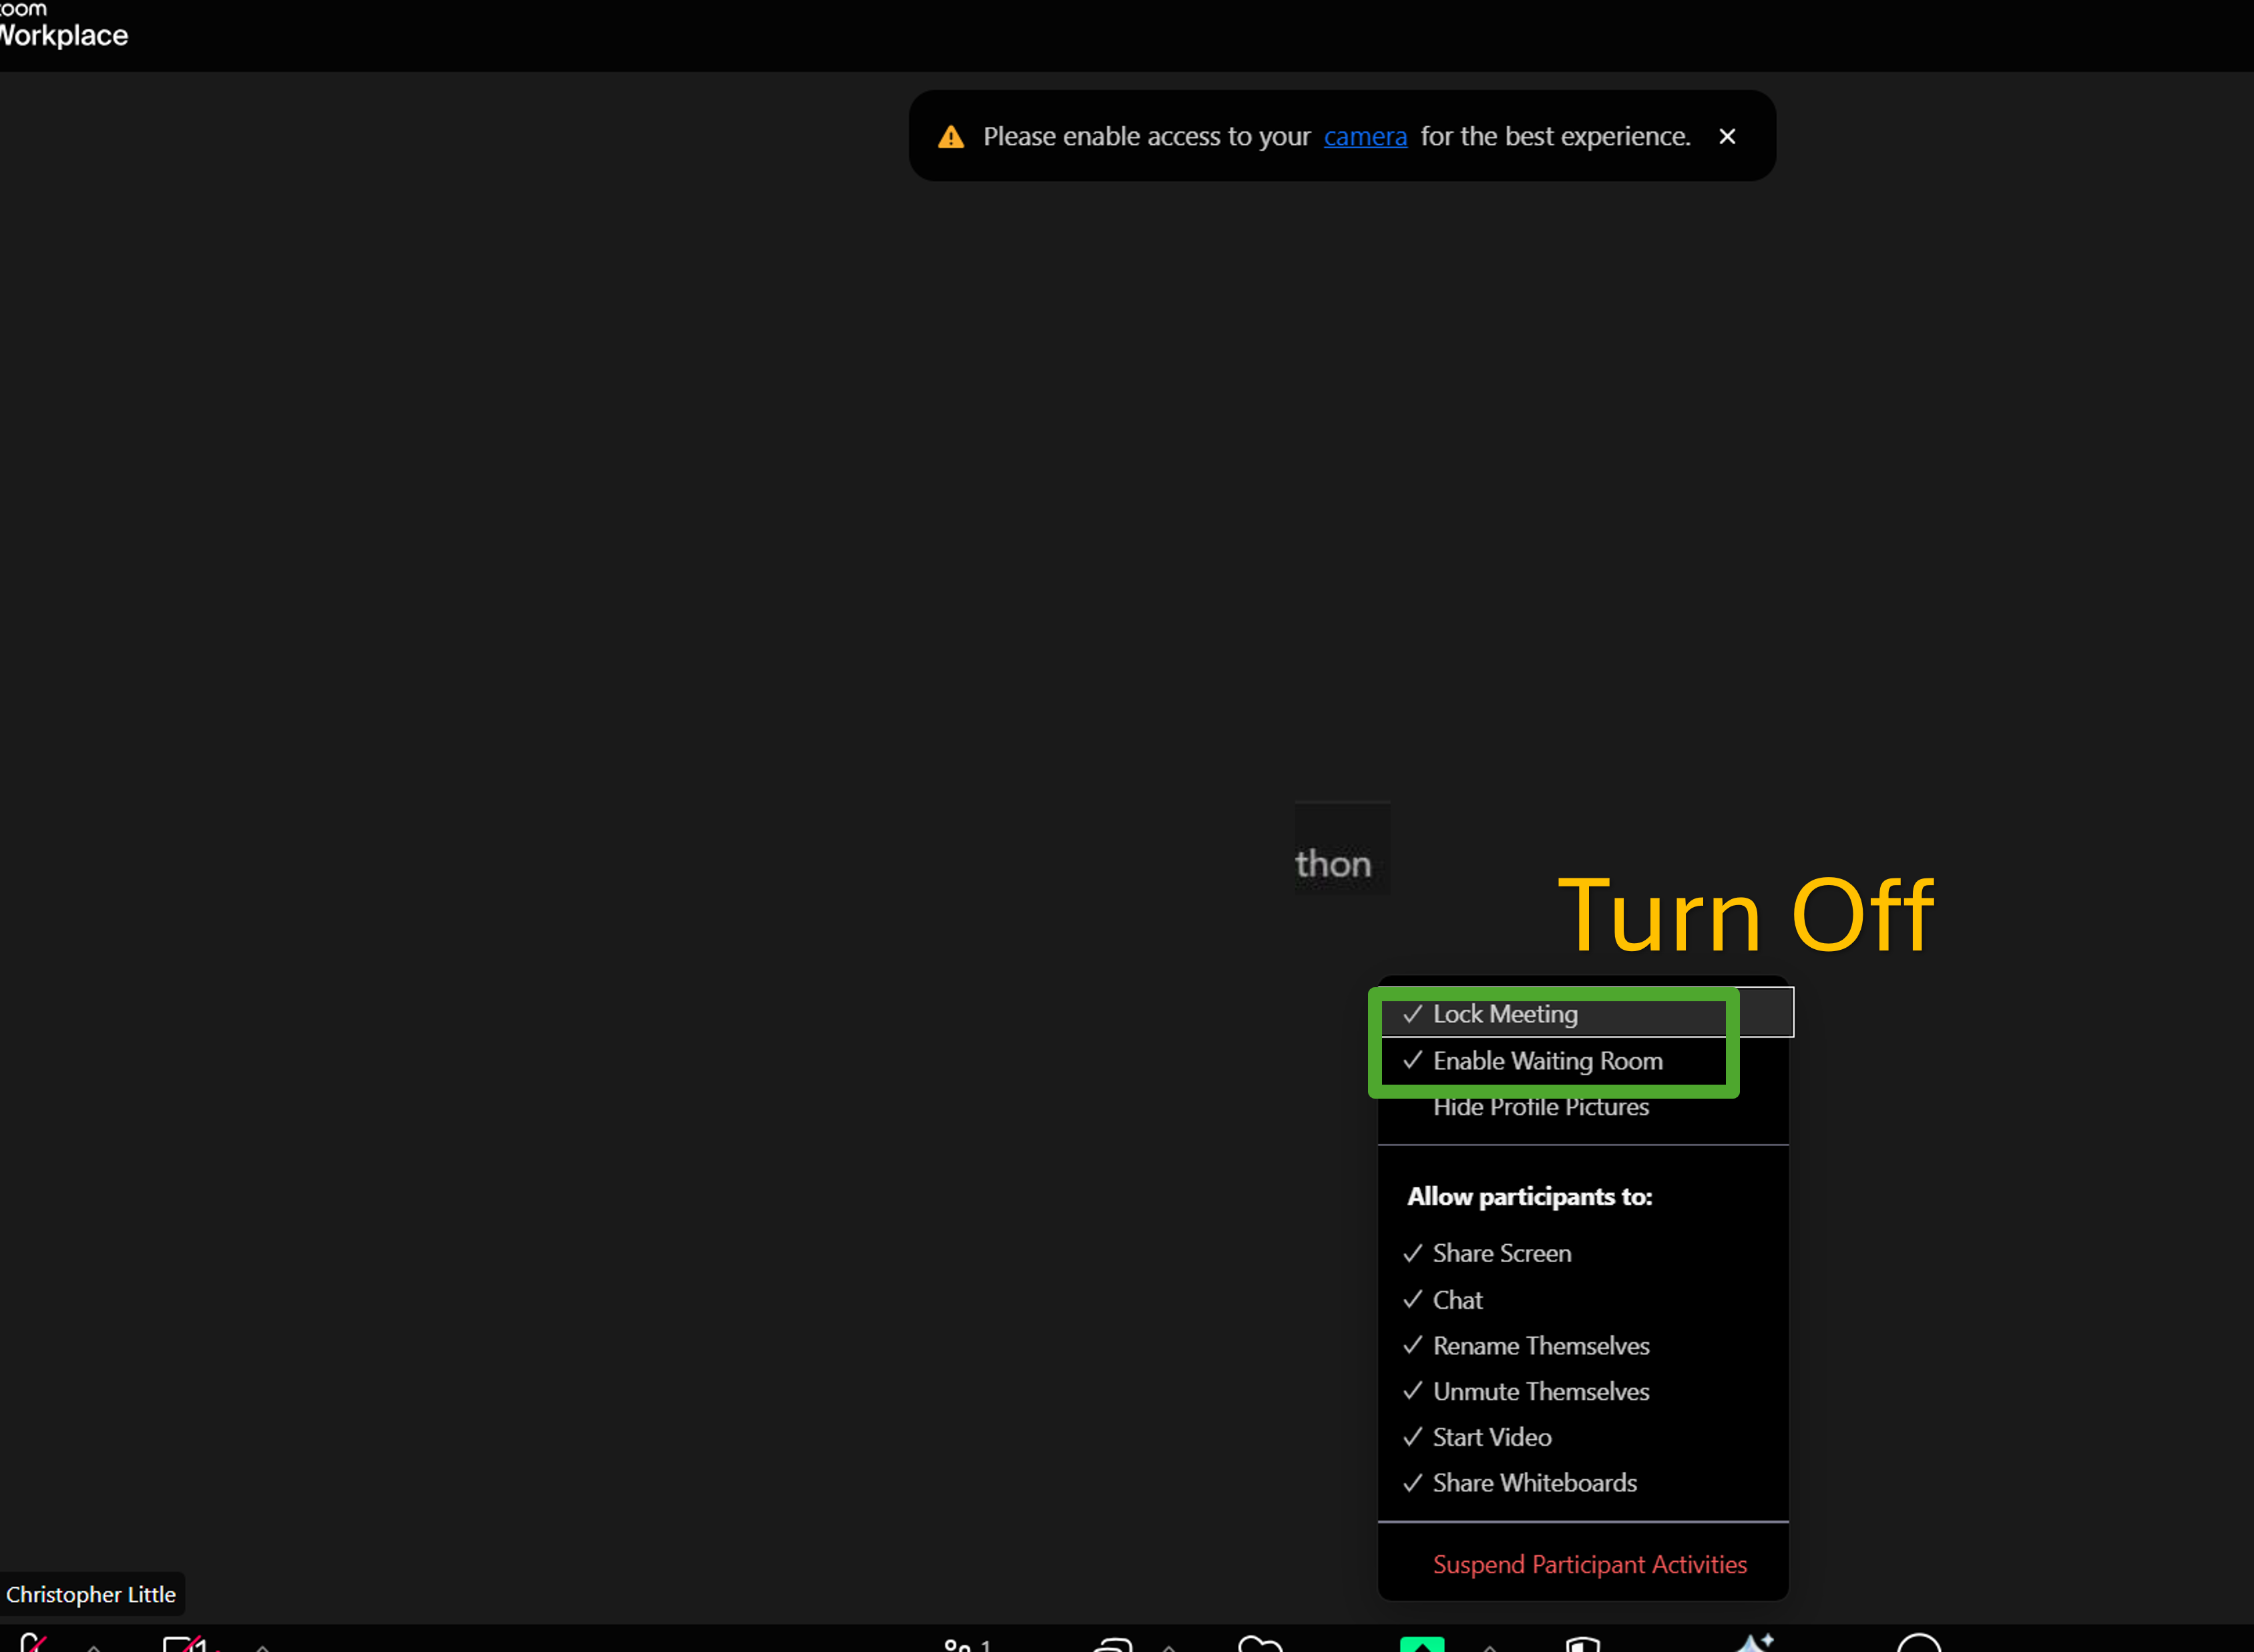
If enabled, participants will not join in meeting.
✅ Correct (Waiting Room OFF)
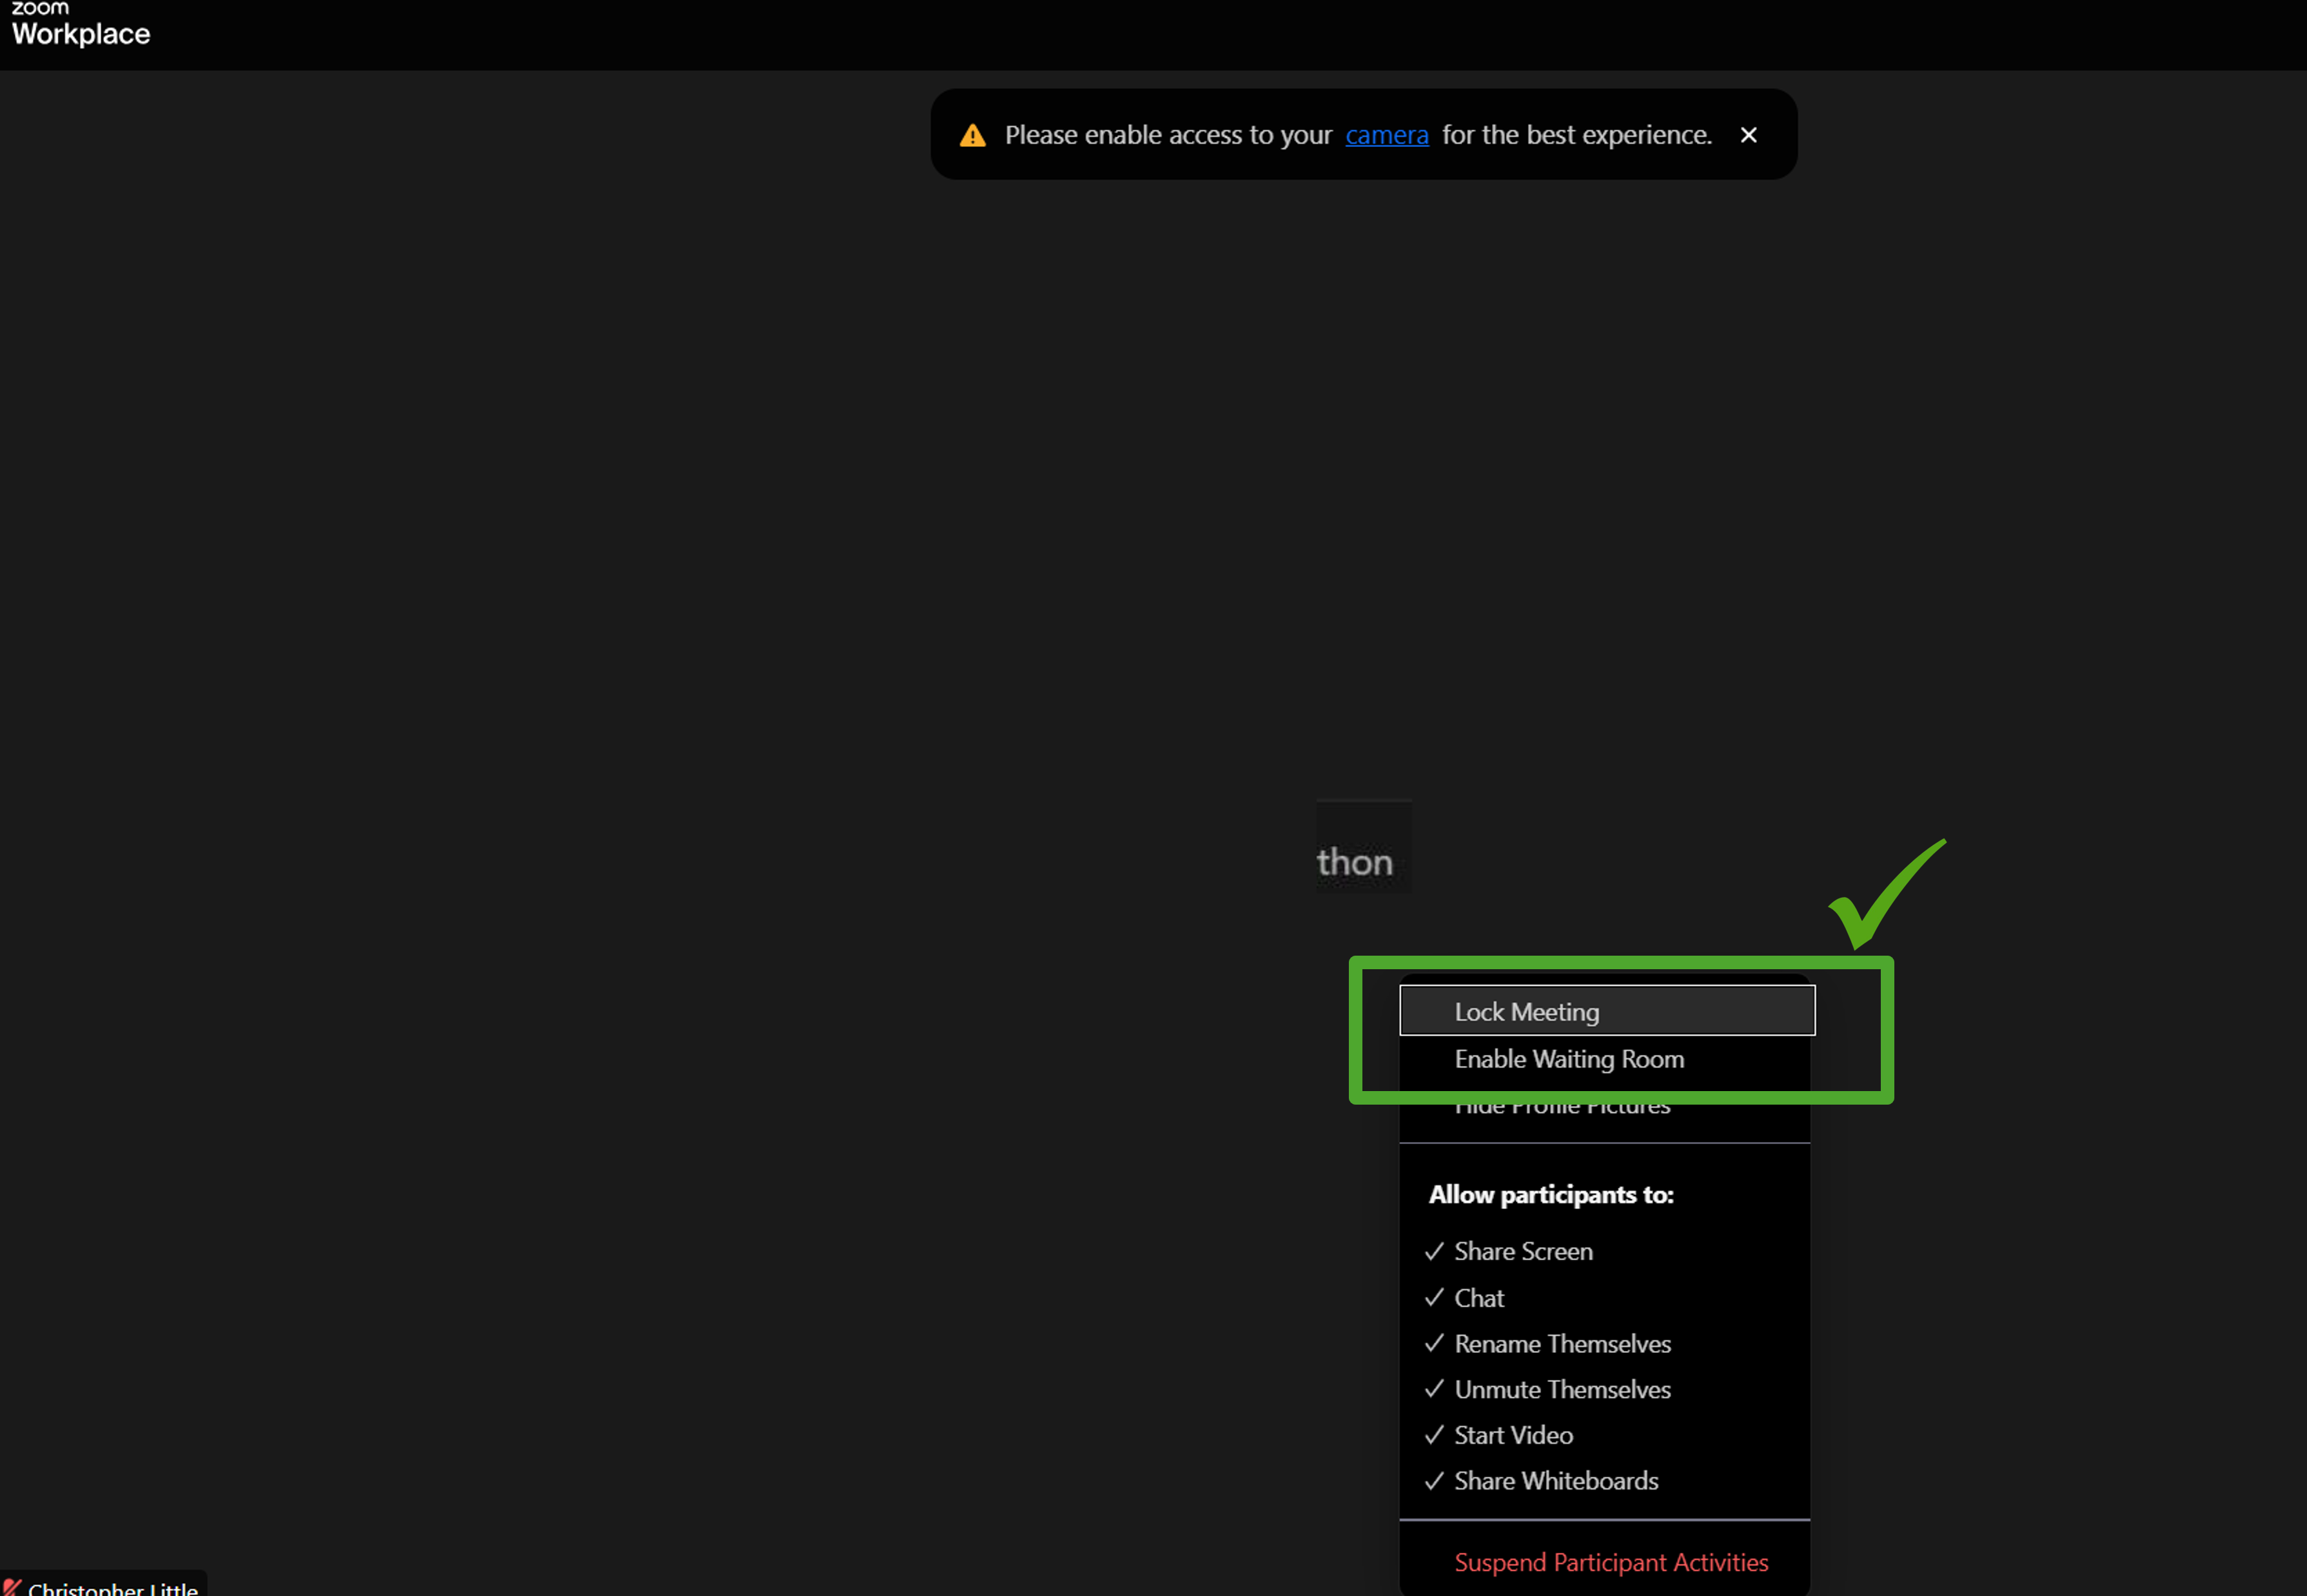
Participants can join immediately without any issue.
Step 2: Authentication Requirement
❌ Incorrect (Only authenticated users = ON)
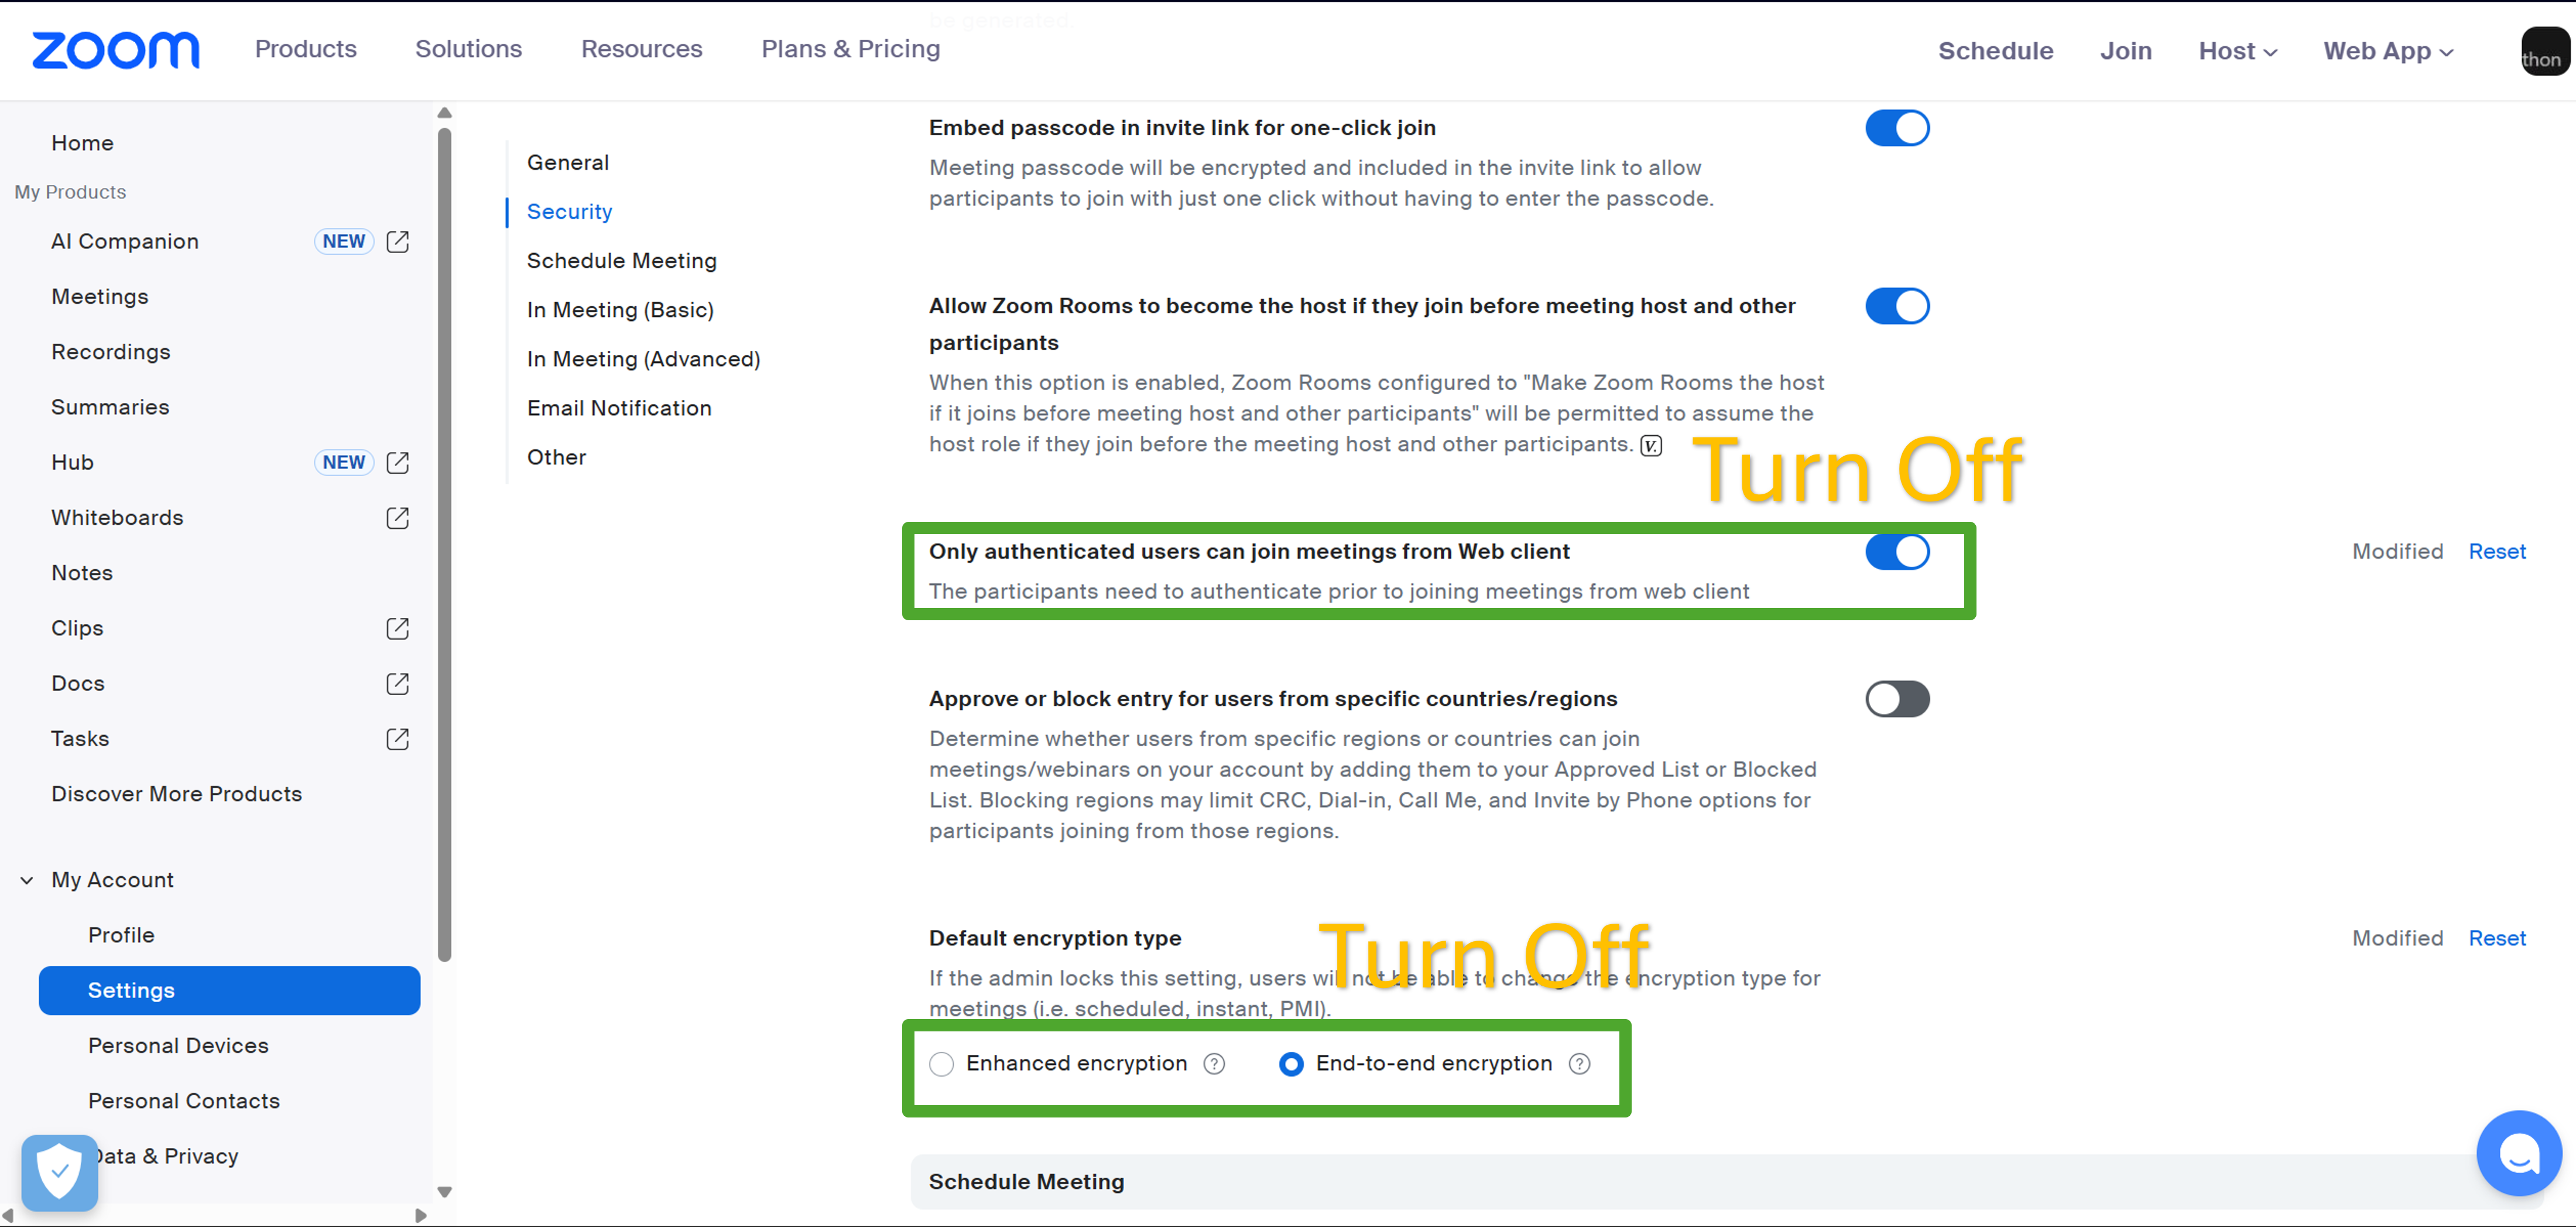
Participants will see a Sign-in page then they will not join in meeting.
✅ Correct (Only authenticated users = OFF)
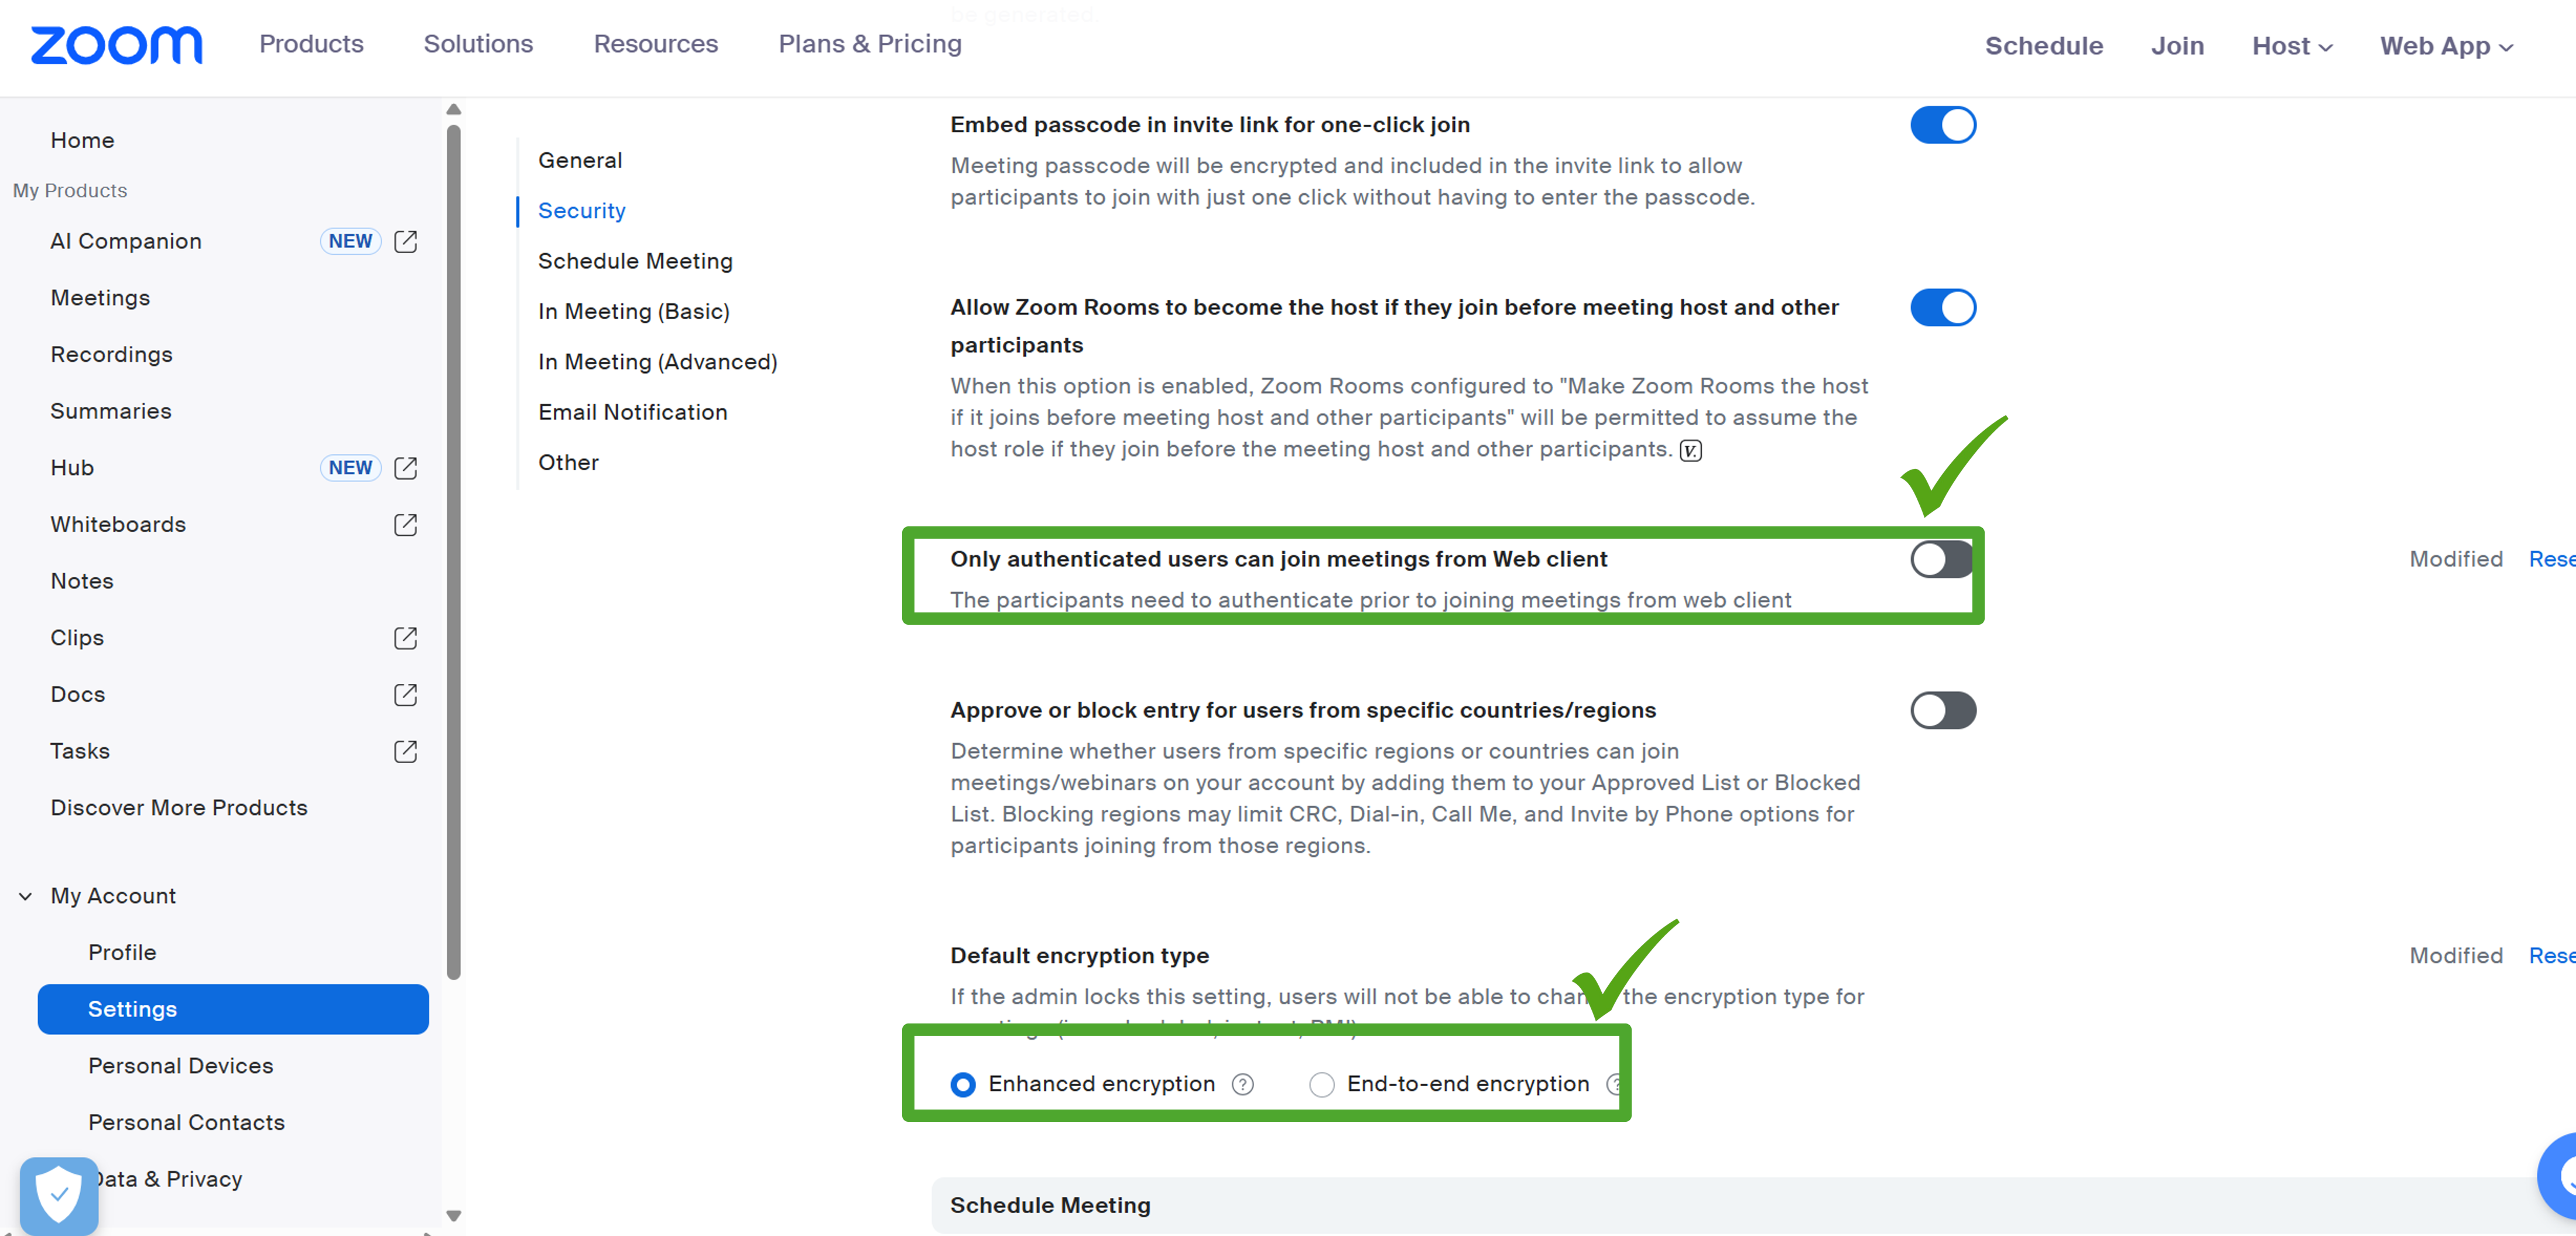
Participants can join meeting without any issue.
Step 3: Webinar Registration
❌ Incorrect (Registration Form Enabled)

Participants will not join in meeting.
✅ Correct (Direct Join Page)
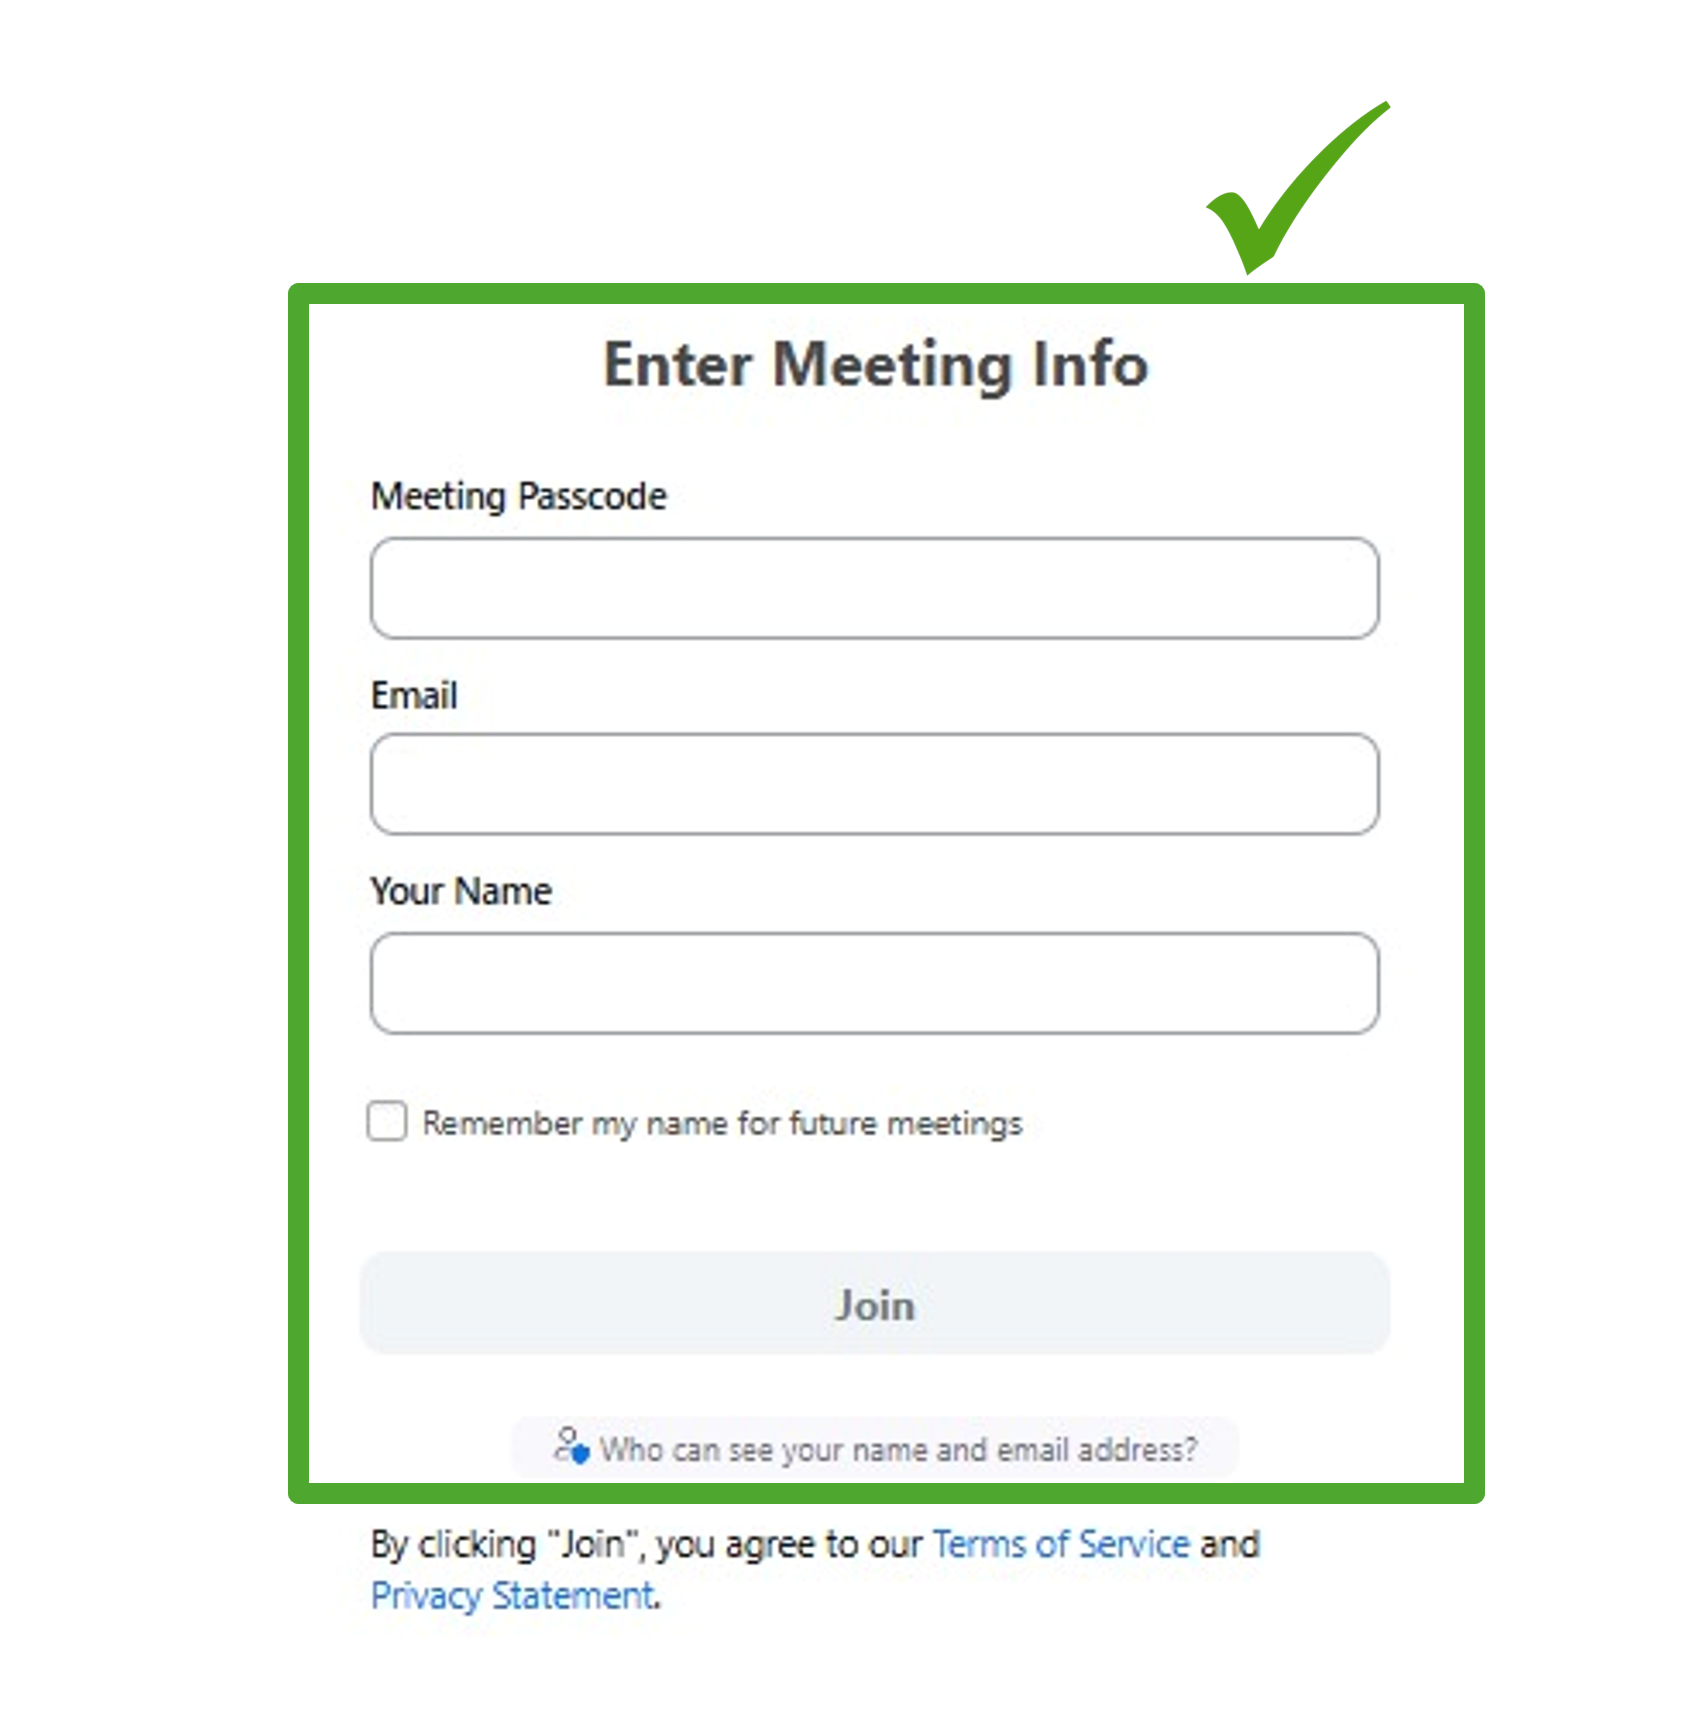
Participants see only passcode,email and name field.so, they can join without any issue
Final Correct Join Page
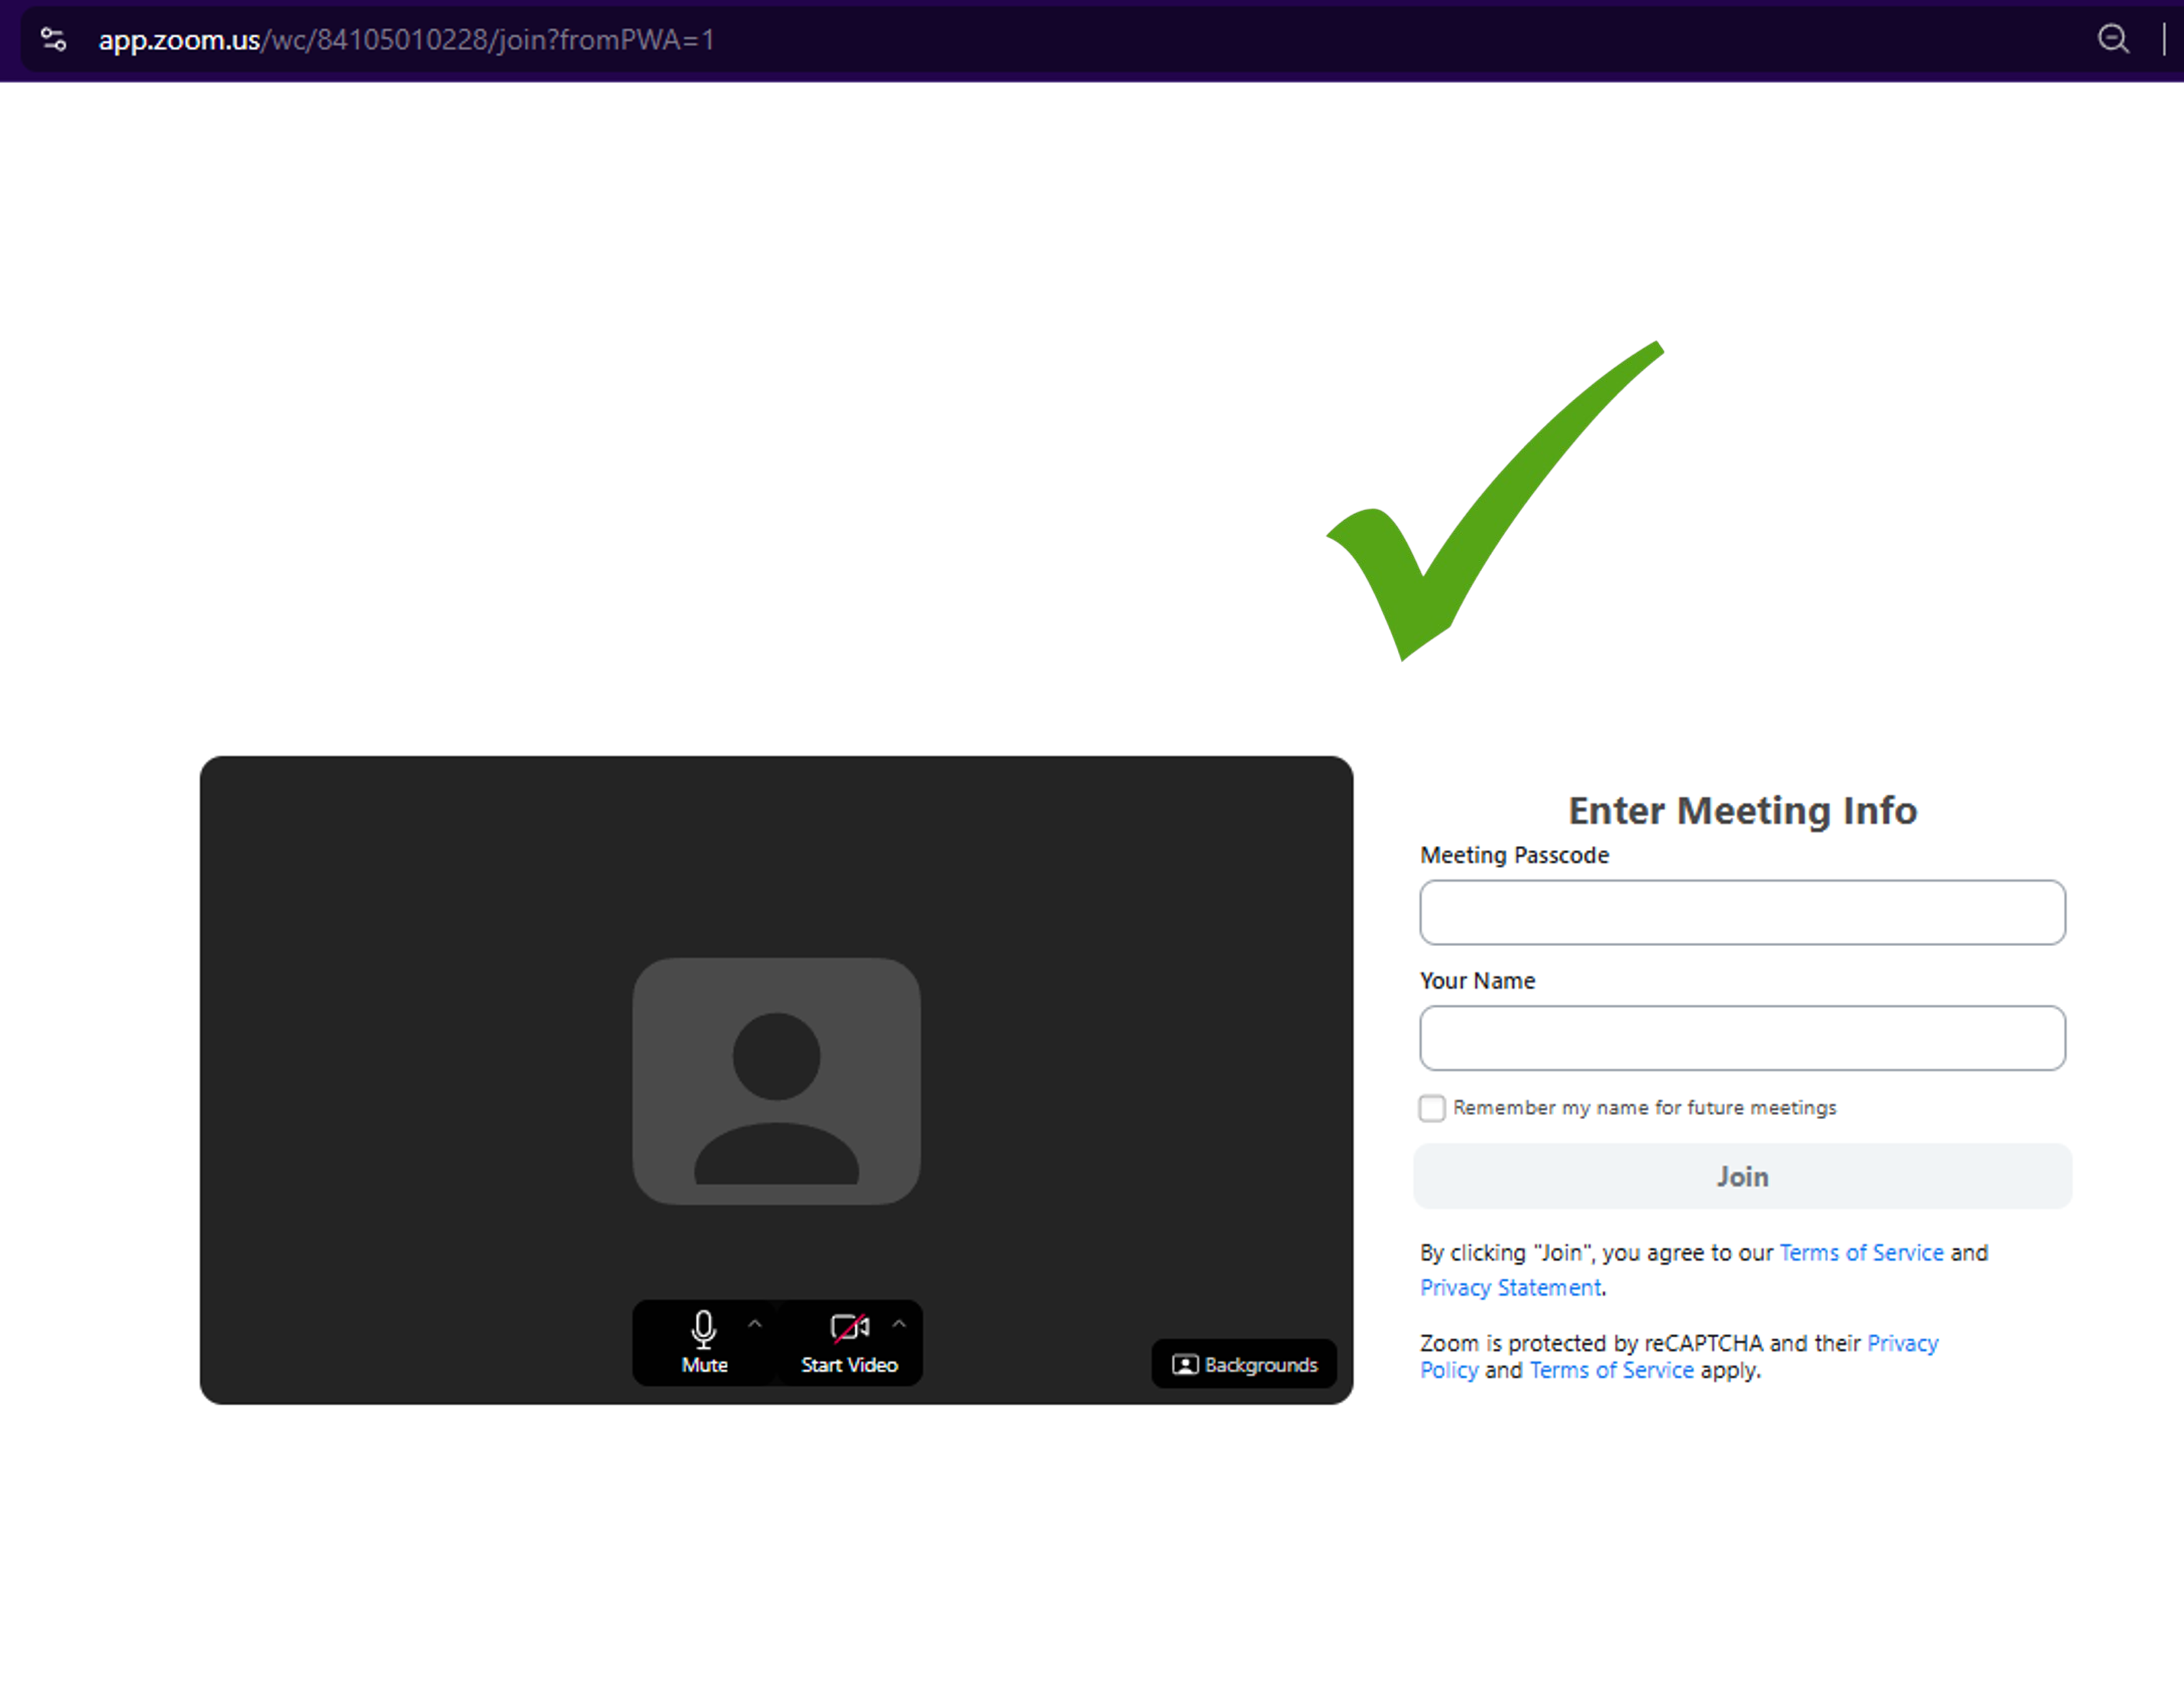
- No waiting room
- No sign-in requirement
- No registration form
- Participants join instantly
Zoom Account Configuration
You can verify and change configuration directly from your Zoom account settings page:
Navigate to: Meeting → Security and ensure required configurations are set before sharing Meeting ID and Passcode.